First Day of the Pallet Shed Project
Level the Area Where the Pallet Shed Will Sit...
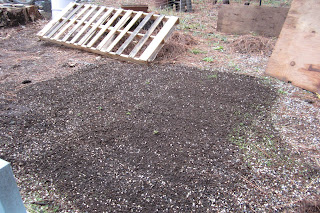
 I started out by leveling out the area where the pallet shed will be positioned, using a rake. The more ground work you do, the easier it will be to level the shed later.
Be sure you clear out a spot a couple of feet larger than the outside diameter of the garden shed. Doing this will save time if you need to adjust the position of the shed later.
Add Blocks to the Pallet...
 Next, I screwed pressure treated blocks to the bottom side of the pallet on the corners and in the middle. These will support the weight and keep the bottom of the shed from rotting. If you lay your pallet directly on the ground, the water will eventually rot the wood and make your shed weak.
Positioning the Pallet...
Position the base of the shed the way that will best suit your needs. Keep in mind where the door will be and other related details.All of the sides of the pallet should touch the ground, walk on it to see if it rocks back and forth, or side to side. If it does, add some dirt under one or more of the blocks or take some away. Don't get too picky about this, you will level it next.
Level the Pallet Shed Base...
Now take bricks, pavers or whatever you have available to you that won't get destroyed by regular exposure to water. Level the pallet from front to back, then from side to side.Take your time and make sure you can get it as close to level as you can, this will make building the rest of your shed a lot easier. If you are out of level, your walls won't quite line up right and it will look like it leans.
You can reinforce this by using concrete if you would like, I am trying to focus my efforts in using recycled materials, so this is why I chose what I did.
Started Forming the Bottom Walls

I finished out the first day by throwing up some of the first parts of the walls. I made sure the pallets were lined up and close to being level before I screwed them down.
Try to screw into the 2x4 on the pallet, as well as the thinner boards, this will help keep the pallet level and ensure that it doesn't move very much.
The walls don't have to be perfectly level at this point, they just need to be close, meaning the bubble should at least be in between the lines on the water level.

Doing this will make the rest of the assembly of the pallet shed a whole lot easier.
Joining Two Pallets Together...
 When joining two pallets together, make sure they are flush and line up good. Use a level or straightedge to help you out.
Check the bottom and top of the walls, and add a piece of wood with a couple of screws inside the walls if you need to suck the two together tighter.
The Front of the Shed...

Mark out the door by finding your center point and measuring over to the left and then the right and making marks on either side.
I went with a 36" door, so I found my center point and measured over 18" to the right and left and made marks on either side.
These marks will be your stopping points for your walls on the front of the shed.
Measure and cut the two front walls then fasten them to the bottom pallet, making sure your pallet on that mark and close to being level.


